Installing Tuners
Following are some steps and considerations for installing tuners. We'll look at converting Grover Rotomatics to Waverlies first.
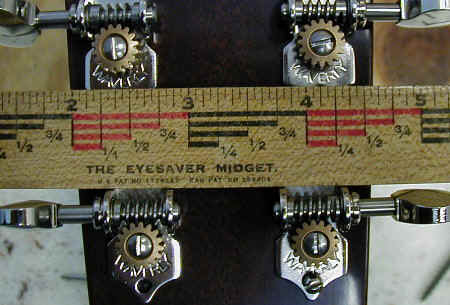
You have two options when installing new tuners: 1) align the shafts at right angles to the peghead, or 2) align the shafts with each other. If you choose (1), then the shafts will be at angles to each other. I think (2) looks better and I nearly always use that method. I line up the tuners by laying a straight edge over the top of the tuners, making sure that it contacts both of the shaft guides evenly. Like this:
And not like this:
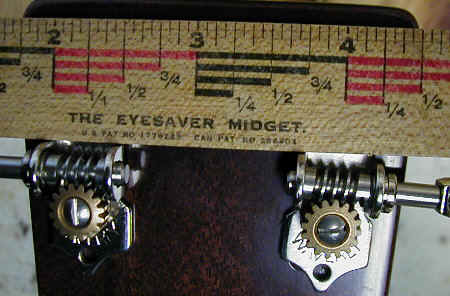
In the second shot (above), the shafts are at right angles to the headstock and you can see that they tilt away from each other. I like the alignment of the top photo best, and I just put a little pressure on the straightedge to hold the tuners in place. Mark the bottom screw holes with an awl.
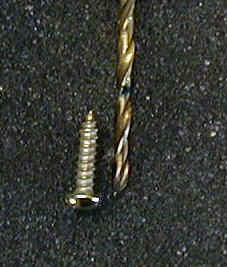
Mark your drill bit to go just a little shy of the length of the screw. Just to double check, put the bit against the headstock and make sure you're not going to drill thru!!!
That's really all there is to it! Put one screw in, check alignment again, and drill the second hole. Watch your drill bit mark carefully and stop when it's just shy of the mark.

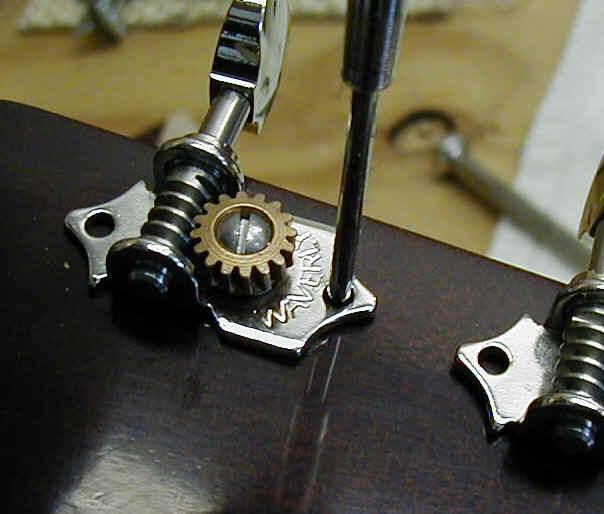
One problem is what to do with the grommet "eyes" caused by the large Grover washers. Here's a shot of some "eyes" with a standard round Kluson/Waverly sized grommet for comparison. Sometimes you can sand/buff these out pretty well and sometimes you just can't. For some reason, it seems like the dents are worse in D-28's than D-18's. Maybe it's my imagination.