

Neck Resets
Step 4:
Reinstalling the Neck
|
|
Okay, the neck and body have dried out and it's time to prepare the neck for re-fitting. One of the first things is to clean out the neck joint and get a nice fresh wood surface. I use a sanding block that's angled to more or less match the dovetail joint. |
|
|
The same block works for the neck part of the joint, too. There's sandpaper on both sides and between the two of them, I can get a nice flat, clean surface. I'll clean up the fingerboard extension and the area on the body where it lies, too. I use scrapers for those areas instead of sandpaper- it's faster and gets the glue better. |
|
|
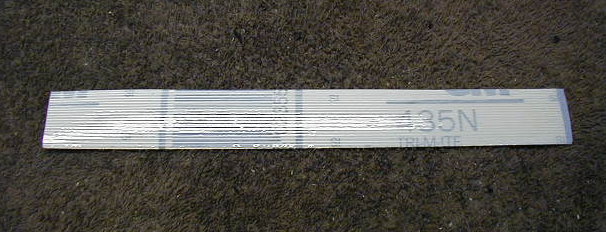
I use TriMite 120 sandpaper backed with ordinary strapping tape for most of my sanding. I'll switch to 220 once the neck is almost fitted, but I use 120 for the bulk of my sanding. |
|
|
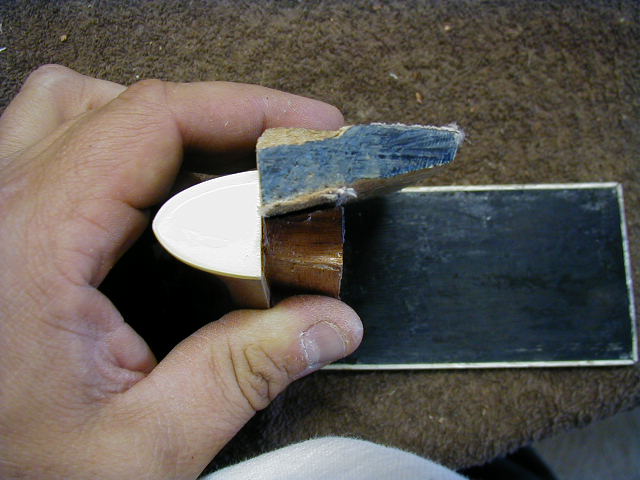
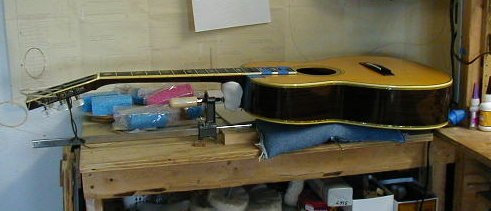
Here's a neck ready to be sanded. I scoop out the inside of the neck to make sanding easier (picture coming!) and pretty much fit the neck using only sanding. I've used a chisel and sanding block to speed up the process, but I just get better results by sanding. The body is protected with low-tack blue masking tape, I've got a score mark on the neck heel to guide me and I'm ready to start sanding. |
|
|
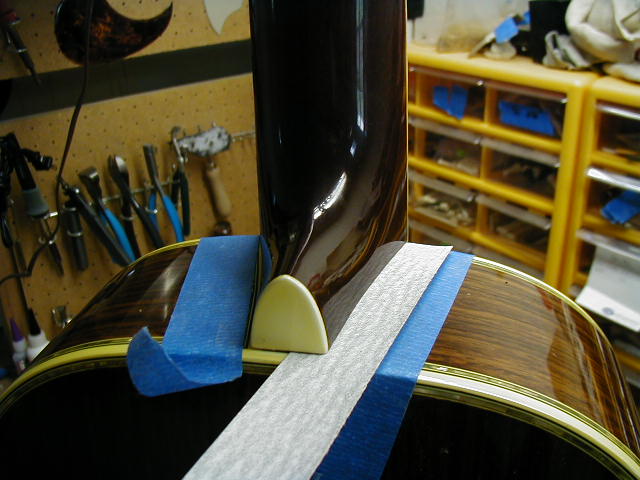
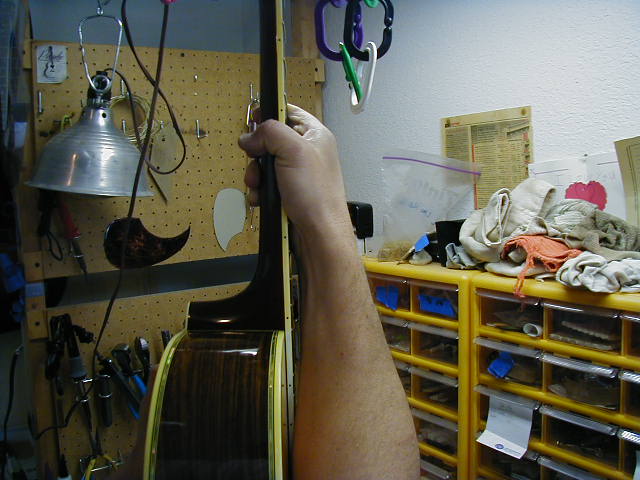
Here we are in action! You have to be careful to pull down on the sanding strips, or you'll round off the heel and won't get a good fit. But don't pull down too hard or you'll wear on the binding. "Just right" is the ticket! I'll give 10 strokes on one side, then switch to the other. If the neck is not aligned correctly, now's the time to sand a tiny bit more on one side or the other to move one or the other of the E's in the desired direction. When I get close to my score mark, it's time to put the guitar in the neck reset jig. |
|
This is the neck reset jig. It's a simple screw
clamp with a "Friendly Plastic" caul up against the neck heel and a
cork-padded piece of wood against the butt. I can put a guitar in
here with the saddle height I want, string it up to full tension, and
see exactly what the action is going to do. This jig has saved me
countless times from "rubber" necks, or guitars that just don't behave
as expected. I'll typically put the guitar in the jig 2-4 times
before I've got the action where I want it. This is a good time to
double check the string alignment.
|
|
|
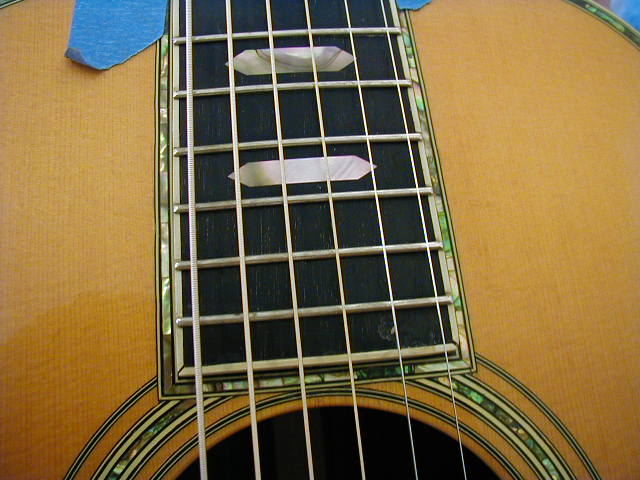
As you can see here, the E's balance out on the fingerboard. This is especially important on guitars with binding like this 000-45. If the strings aren't even, it's very noticeable. On 45's you may have to carefully compromise the neck between the abalone inlay, the black underlying layer, and the string alignment. Not all guitars are square!! This one is pretty good, though. |
|
|
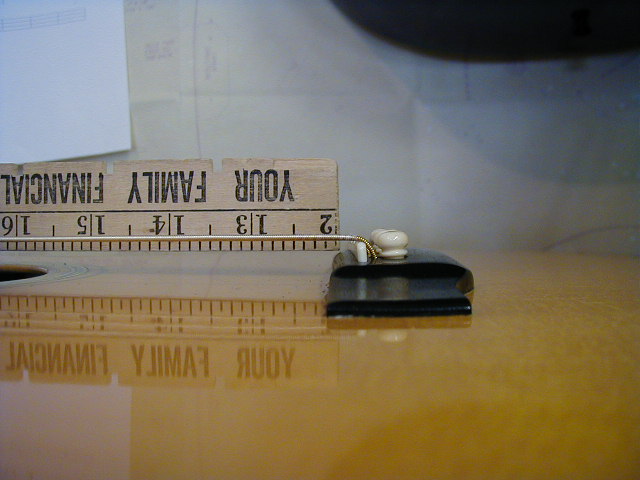
Here's the "yardstick check" in action. The yardstick is running down the fingerboard and, as you can see, just barely touches or even slightly clears the bridge. You must make this check under string tension, though! Depending on the neck and looseness of the top, this yardstick might be almost to the top of the saddle with the string tension removed. Just for reference, if I'm shooting for a .098" low E under tension, I find that the low E will measure .060-.076" with just a little string tension. The action will change that much under tension. That's why I like the jig- I can get a real-life check on the action with the strings at tension and the saddle height I'm going to use. |
|
|
When the neck fits and I'm happy, it's time to glue shims. I prefer to glue shims to the neck. I like holly for shim material because it has a cool compression feature that really helps get that final snug fit down. I'm just using two pieces of scrap wood here to clamp the shims down. I'll sometimes use pieces of cardboard or paper as a test shim to give me an idea of how thick my wooden shims need to be. |
|
|
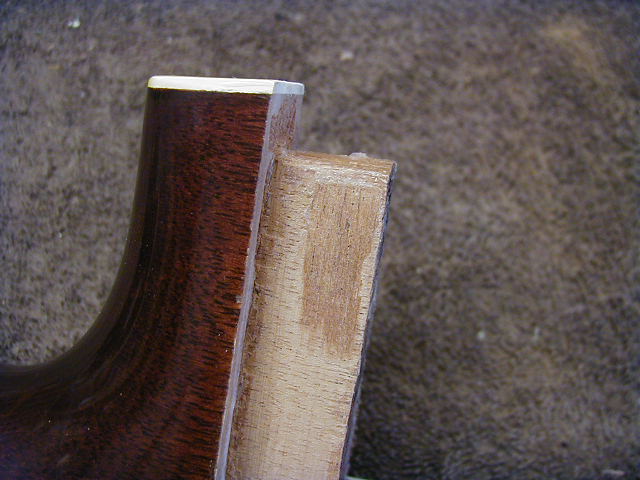
After the shims have dried comes the most tedious part of the job for me- sanding down the shims. I use the same block that I used to clean out the dovetail and just work on the shims until I get to this point. This neck is still sitting just a little high. From here, I sand very cautiously. A little too much and the neck will be loose. |
|
|
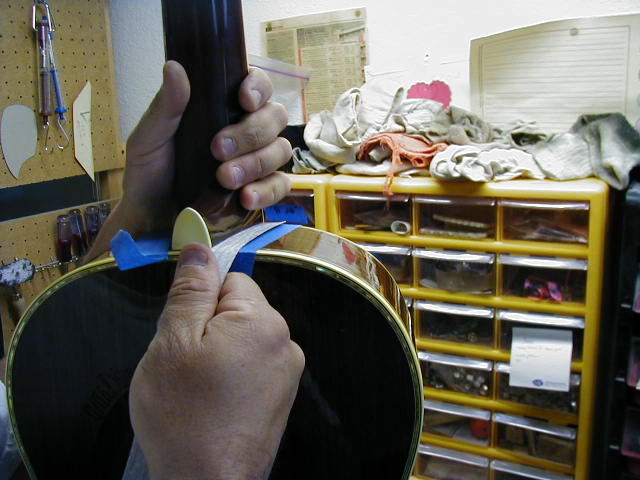
What I'm doing here is pulling forward on the neck to simulate string tension. I shouldn't be able to rock the neck forward at all. If I can, the strings are most certainly going to move it. I want the heel to fit tight all the way down, every step of the way. I used to use chalk to check my dovetail fit, but after doing 50 or so necks, I developed a feel for it. If the neck fits tight, but I can get a heel gap, then it's binding about 1/2 way up the dovetail. I want it to fit snug at the heel and rock just a little in the upper portion. |
|
|
And by the time I'm done, this might be all the shim that's required. This is a rare mahogany shim.... I normally like holly but I must have gotten a tight fit from this shim. |
|
|
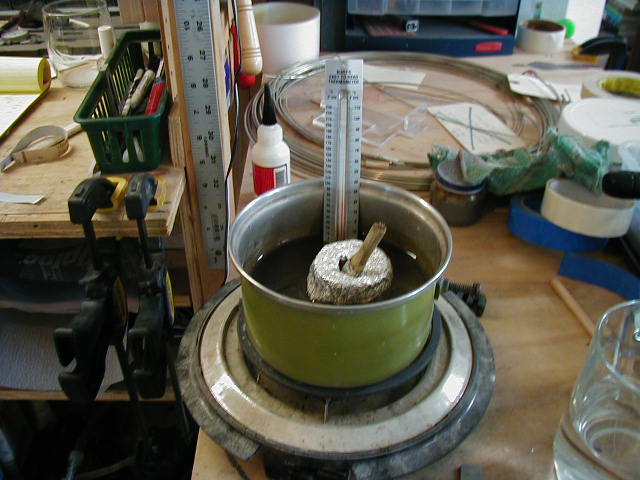
We're ready to heat up some hide glue! This is my simple little hide glue pot. It's just a small pot with enough water to float the baby food jar. I use a 1/4" natural bristle brush, cut short. The aluminum cover keeps moisture in the jar. I heat to 145 deg, turn the burner off and let the glue sit in the water for a few more minutes to make sure its up to temperature. The electric burner will keep heating even when off and the water will maintain 140-150 for many minutes. While the glue is heating, I'm heating the fingerboard, dovetail, and body with a heat lamp and hair dryer. I like my wood to be good and warm before applying the glue. |
|
|
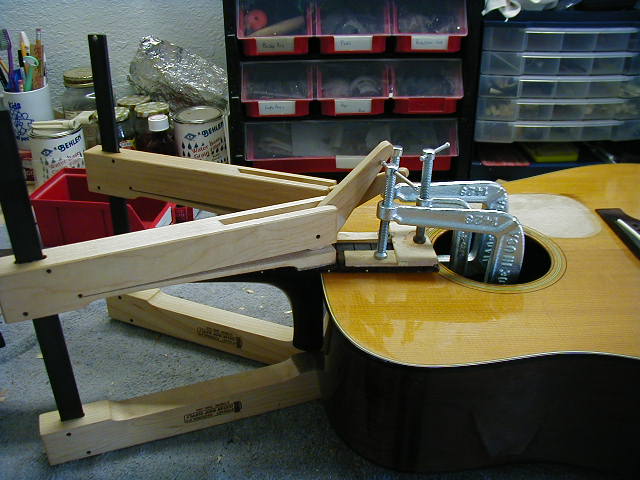
Here's the neck all clamped down. I'm using a wooden scrap under the two cam clamps to apply pressure clear across the fingerboard. This particular fingerboard didn't want to go down on the edges and I'm using two clamps on the fingerboard. Most of the time I can use a single block and clamp. You can use 1 clamp, but I'm a clamp guy and I like to use multiple clamps. |
|
|
Here's what that neck/body gap looks like under pressure. Hot hide glue really helps the joint slide together and I can close a 1/64" gap pretty easily. When the neck is clamped, I'll pick the guitar up and pull forward on the neck to see if I can get a heel gap. Once or twice I've been able to, and I can quickly and immediately pull the neck off again and go back to the "shim" stage. |
|
|
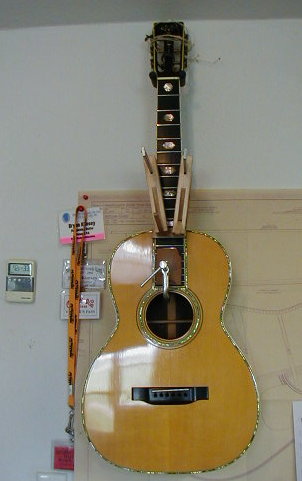
Here's the freshly set neck all clamped up and ready to dry. I'll hang it here for 2-4 hours and then unclamp it and let it sit overnight before stringing it up. From here on out, it's just a matter of making a new saddle, cleaning up stray glue, and then keeping an eye on things. I like to leave a guitar restrung for 7-10 days before setting the final action and sending it home. |
The fingerboard: to shim or not to shim? (Coming!)
Pictorial of various dovetails (Coming!)