An Actual Case....
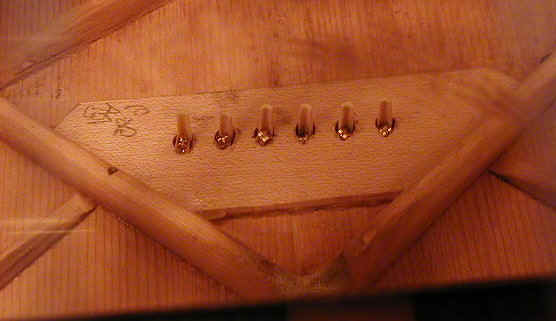
This is a mid-70's D-28 that arrived with a replacement, non-slotted bridge plate. The guitar was using deeply grooved fossil walrus ivory pins. Note how deeply sunkent the balls of the E, A, and D strings (right hand side) are in the bridgeplate.
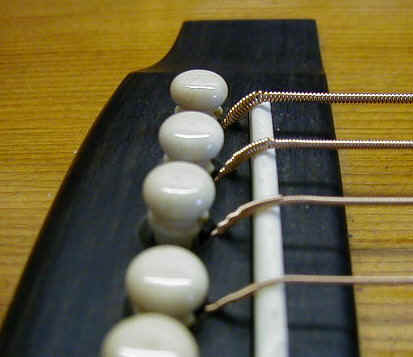
And here's what the top of the bridge looked like. The owner was using the trick of running two ball-ends on each string in order to pull the windings down. That's one way to cure the symptoms, but it's a hassle and often dodges the real problem, which is that the ball ends are sunken in the bridgeplate.

Here's what happens if you simply turn the pins around so that the pin grooves face the rear of the guitar. Compare this to the top photo (both are under full string tension). This would work for awhile, but notice the black air gap around the pins- these pins are loose in the holes, and sooner than later, the balls will start working their way back into the bridgeplate. We need to fix this.
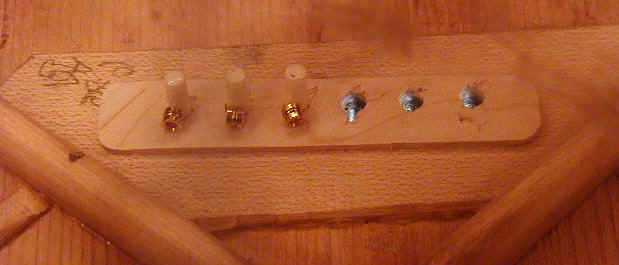
I don't really like using these overlay strips, but in this case, it was the easiest solution. There's nothing wrong with old bridgeplate- not cracked, warped, or loose- so I really don't need to go yanking it out. When I use an overlay like this, I use the same wood as the bridgeplate and I make it as thin as possible. This one is 0.040" thick. It's simply going to give us a fresh hole into which I fit the pins snugly. Notice that the right 2 holes are non-slotted at this time, with the D-string hole slotted. Also note that there's no air-gap around the new, non-slotted bone pins I'm using instead of the worn fossil ivory pins. The slots in the fossil pins were so worn that the effective diameter of the pins were reduced.
For comparision, here's the new non-slotted bone pins (left) compared to the old slotted fossil ivory pins (right). It's not a huge difference, but why not do it right?
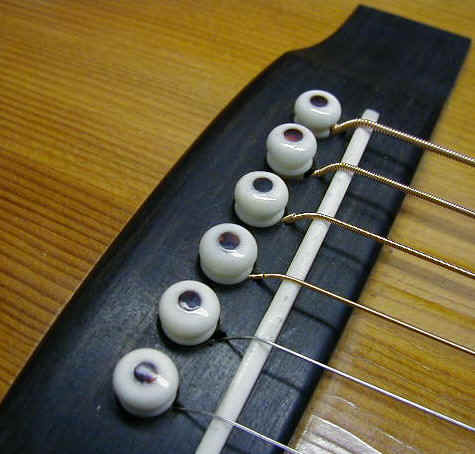
And here's the complete bridgeplate, with slotted holes, the overlay strip, and pins that fit.

A side shot of the balls, showing how they are completely locked into the plate's slot and held there by the non-slotted pins. Go back and compare this with the sunken pins that we started out with....
Here's another trick I use fairly often on Martin guitars....same guitar as above....

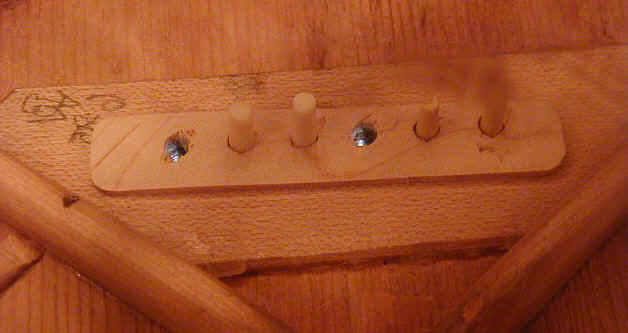
On Martins, the low E hole (and A, sometimes) is pretty close to the saddle. If you slot this hole fully, the low E can move very close to the saddle, creating a too-sharp break angle. So, I'll leave the low E non-slotted, or close to it, at the bridge side and slot it on the bridgeplate side. If you tried to put a non-slotted pin in the hole, it'll stick up, like this one is doing.
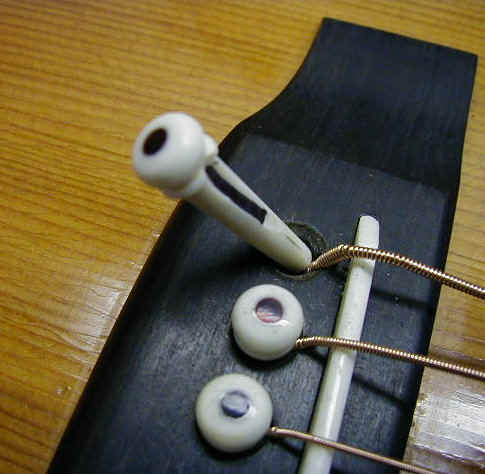
To solve this, I slot the low E pin at the top only, leaving the lower portion pretty much non-slotted. I draw a black magic marker line in the slot to help remind customers of this "special" pin. This way, the ball end is still pushed into the bridgeplate slot, but the bridge-side can have a lower angle.
When in place, it looks like this....if you look closely, you can see the low E diving into the relief groove in the pin. The break angle of the low E is more acceptable. Note that the winding of the low E is just peeking out above the pin's collar. This is the same bridge and same saddle as I started with up above, where the windings were laying on the saddle.